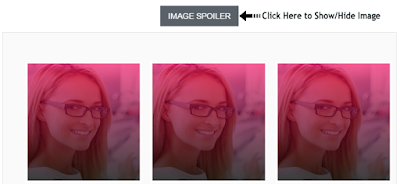
Image Spoiler With Simple Animation For Blogger
Image Spoiler With Simple Animation For Blogger
we often use
Spoiler effect or show hide effect in our Blogger template. This is useful for
hiding multiple image and which can be visible by clicking on an spoiler
button. The main effectively of this widget is to loading the Blog post fast.
Because if you Blog post contain 5/10 images then it will take longer time to
load, so image spoiler is the solution to control loading speed. So in this
tutorial I will show you image Spoiler effect or show hide effect where you
will able to hide multiple images and visitors can view by click on Spoiler
button. Just follow the below steps-
Step 1 Log in to your
Blogger Account and Go to your Blogger Dashboard
Step 2 Click on
Now click on -> Template -> Edit HTML->
Step 3 Now find the ]]></b:skin> by pressing Ctrl+F (Windows) or CMD+F (Mac)
Step 4 Copy the script from below and Paste it above/before ]]></b:skin>
#image-spoiler {text-align:center;}
#image-spoiler button{margin:10px auto;cursor:pointer;background-color:#5a6269;color:#fff;padding:10px 14px!important;text-transform:uppercase;border:none;font-size:14px;transition:all .3s ease-out}
#image-spoiler button:hover, #image-spoiler button:focus {outline:none;opacity:1;color:#fff;}
#spoilerpanel {padding:1px;text-align:left;background:#fafafa;border:1px solid #e6e6e6;}
#spoilerpanel {padding:24px;display:none;}
#spoilerpanel img {background:#f5f5f5;margin:10px auto;}
.spoilerrow {-webkit-column-count:3;-moz-column-count:3;column-count:3;}
.spoilerrow img{-webkit-backface-visibility:hidden;margin-bottom:15px;max-width:100%;}
.spoilerrow br {display:none;}
Step 5 Now again find
the </head> by pressing Ctrl+F (Windows) or CMD+F (Mac)
Step 6 Copy the script
from below and Paste it above/before </head>
<script src='https://ajax.googleapis.com/ajax/libs/jquery/1.8.3/jquery.min.js' type='text/javascript'></script>

<script type='text/javascript'>
//Image Spoiler widget by www.bloggerspice.com
$(document).ready(function(){$("#image-spoiler").click(function(){$("#spoilerpanel").slideToggle("normal")})});
</script>
Customization
- If you template already contain latest Jquery then you don't have to add the below jquery file.
<script src='https://ajax.googleapis.com/ajax/libs/jquery/1.8.3/jquery.min.js' type='text/javascript'></script>
Step 7 hit the Save template button.
HOW TO MAKE IT WORK?
For
using this Custom button you have to add the code in HTML view while writing a
Blog post. Just write a post and from Post Editor Select HTML mode. Now add the
below code-
<div id="image-spoiler"><button>Spoiler with Image</button></div><div id="spoilerpanel"><br />
<div class="separator" style="clear: both; text-align: center;"><a href="IMAGE URL HERE" style="margin-left: 1em; margin-right: 1em;"><img src=" IMAGE URL HERE " style="border: none;" /></a></div>
</div></div>
Customization
- To add Images on Spoiler just replace IMAGE URL HERE with your image link
- For adding multiple image just add the whole code twice. Just like below-
<div id="image-spoiler"><button>Image Spoiler</button></div><div id="spoilerpanel"><br />
<div class="separator" style="clear: both; text-align: center;"><a href="IMAGE URL HERE" style="margin-left: 1em; margin-right: 1em;"><img src=" IMAGE URL HERE " style="border: none;" /></a></div>

<div class="separator" style="clear: both; text-align: center;"><a href="IMAGE URL HERE" style="margin-left: 1em; margin-right: 1em;"><img src="IMAGE URL HERE " style="border: none;" /></a></div>
</div></div>


Post a Comment