Text Customization inside HTML/JavaScript Gadget in Blogger
Text Customization inside HTML/JavaScript Gadget in Blogger
Generally we use HTML/JavaScript Gadget
for adding third party widget. This is the good option that anyone can easily
add HTML/JavaScript widget in Blogger from Layout. However if we add simple
text on HTML/JavaScript Gadget then it will appear with default font. But we
can change the text and add some variation in text which is unknown by many new
Blog user. So for customizing text inside HTML-JavaScript Gadget in Blogger
please follow the below steps-
Step 1 Log in to your Blogger Account and Go to your Blogger
Dashboard
Step 2 Go to your Layout tab.
You will see the complete Layout of your Blogger Template.
Step 3 Click on "Add
a Gadget" then under Basics tab select "HTML/JavaScript" Widget.
Step 4 Now write any text
into Content field of "HTML/JavaScript"
Gadget. And click on Rich Text link from
top right corner. Now it will change the Edit
HTML view.
Step 5 Now Block the text and click on b icon for Bold
text, i icon for Italic text.
Step 6 Now we will change the font color. So simply click
on ForeColour Icon and select any text color.
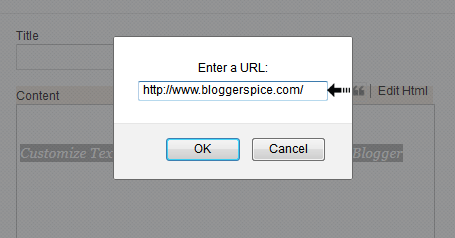
Step 7 In this step we will add an Link. Whoever click on the text the text will redirect to another
page. Just Block the text by using your mouse and click on CreateLink
icon and write your destination URL there. For example I have written
www.bloggerspice.com URL, that means whenever a visitor click on text then s/he
will be redirect to my Blog home page. And finally click on OK button.
Step 8 In this step we will add this text into Blockquote. So
again Block the text and click on Blockquote icon. Now your text
will show within Blockquote tag.
Step 9 Now
hit the Save button.


1 comment