SpeakPipe Voice Mail Widget for Blogger, WordPress, Weebly
How to Add Voice Message widget through SpeakPipe in your Blogger, WordPress, Weebly, Joomla and Tumblr Blog.
Leaving message on Blog it maybe time consuming. And there
are many users whose who don’t like to write longer message by typing from Smartphone.
On the other hand for writing a message readers don’t feel interest. So the
solution is Voice mail And this is the quickest way to make a connecting bridge
between Blog writers and readers.
Now-a-days I have seen many Blog those who leave their
Skype, Viber or whatsapp number for contacting with them. But this can be made
your identity public. Sharing personal facebook account is a stupid method for
connecting with readers. After certain period of time you would see you won’t
able to use your facebook account for personal purpose.
We should switch to voice message features for interacting
with readers. But how a Blog readers can easily interact with Blog owner. This is
a simple question. If Blog write and reader’s language are not same then
readers may feel embrace to leave voice message, on the other hand Blog writer won’t
able to answer comfortably to readers. We should take this issue seriously.
Though it has both advantage and disadvantage but we should give a try.
You may hear about SpeakPipe, if not then no problem. SpeakPipe
is a voice message service provider for micro to large Blog and website. But
the service is not totally free. It has free feature as well as paid
subscription plan. As a small Blogger we can use free subscription plan. But
the limitation is only 20 voice mail can be sent per month, and maximum
duration of each message will be 90 seconds.
Don’t think SpeakPipe work like your cell phone that you can
directly call to your Blog owner. Just you need a simple online voice recorder
and you can do it by SpeakPipe voice recorder. And the main positive site of
this widget you can use this on Blogger, WordPress, Weebly, Joomla and Tumblr
Blog or in any other platform without any restriction.
How to register with SpeakPipe?
Before availing the voice mail service from SpeakPipe you
must register with them. And the registration process is really simple.
Step 1 Please
visit https://www.speakpipe.com/signup
and write your email, password and hit the Continue
button.
Step 2 A
verification email with link will be sent to you instantly. Check your email
and please confirm your SpeakPipe account by click on verification link.
Step 3 You have
now 3 options to use SpeakPipe such as Inline
widget, Dialog widget and Voice
Page. And use any one according to your need. For Blog site Dialog widget is suitable. So we will
install Dialog widget for our Blog.
Step 4 In Dialog widget box click on Customize
button or you can enter into customization option by directly visiting https://www.speakpipe.com/account/settings/widget
URL. Because we will customize our SpeakPipe voice widget for our Blog. And
make necessary customization such as Button position on website, widget button
color Dialog settings, opt-in email integration and Balloon settings. Finally
you will get the widget Installation script.
Step 5 Now it’s
time to install on your Blog or website. You can directly add the script on
your Blogger template before closing </body>.
Or click on Install button from the top of the screen and select Install on a website under Dialog widget.
Step 6 SpeakPipe
will take you on Blog platform selection page. From there select your right
platform to add the widget. And you will get visual instruction for your
desired Blog platform.
How to leave a voice message through SpeakPipe?
After installing SpeakPipe
it will appear on your Blog. And when readers want to leave a voice message
then s/he has to go through below steps-
Step 1 Click on Send Us a Voice message floating button.
Step 2 SpeakPipe voice recorder will instantly
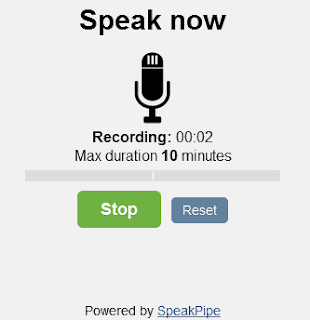
load on screen like popup widget. From there click on Start recording button. Now Record your voice and listen to your
record, after that send it to the author.
Step 3 Now you
have to allow access to your microphone. So click on Share Selected device. And
Speak now for recording.
Step 4 After
recording press Stop button and Send
it.
That’s it. You have successfully recorded your Voice message
and sent to website owner. I think this is really amazing. But has some limitation
for Free Plan subscriber. If you wish you can Join Bronze, Gold and Premium
subscription Plan for use this service without limitation. And you will get 230
day money back guarantee after purchase.
You can share with us
about your personal experience after using SpeakPipe. We are excited to hear it
from you.


Post a Comment